AVENGER CANTINA
CMDR/BG DanMan/Vulture-1/CRS Dsp/IW
EMPEROR'S HAMMER GOALS FOR 1996
1. Get the roster up to 500 members, at least.
We recruited >300 in one year, so we should be able to do more in two.
2. Establish a greater Internet prescence.
I am currently working on a template for squadron home pages.
3. Expand to encompass Simming.
Many onliners are also simmers, and they could be easily recruited if we had this kind of sub group.
4. Diversify horizon.
Encompass more programs that could relate to our general mission. For example: Privateer for a "Merchant's Guild", or SimCity 2000 for colonizing planets we conquer.
5. Establish a greater "Real Life" prescene.
Maybe ads in a local newspaper. Possibly conventions. We could replace Star Trek as the number one sci-fi popularity group!
6. Create a "Hammer Only" network.
I read that the Alliance Sim Group (Star Wars) is establishing their own network, and I believe that they are smaller than we are. A national network might be hard, but maybe a series of BBSs?
7. Hold exterior competitions.
Since we are The Numero Uno Star Wars group in the world (at least online), we might hold friendly competitions with Star Trek, Battletech, RPG, or fantasy groups.
8. Hold interior competitions.
Many times, the idea for having weekly competitions on certain missions has come up, but it usually sinks back down. This could make some more internal competition for ranks or position.
9. Get more members active.
When I look at the message boards, or the newsletters, I see maybe 20 people who are really standing out by posting and making missions, and making submissions for the newsletters. If every Emperor's Hammer member posted maybe once or twice a week on the boards, we would get some major discussions going. Plus we would also go through boards at about one a week!
10. Participate.
Much of the above can be summed up in that word. If everyone in this club participates to their fullest, we will have the best organization on this planet, or any other!
Respectfully submitted,
Brigadier General DanMan
CMDR/BG DanMan/Vulture-1/CRS Dsp/IW/EH [App] [Lancer] MoT -rh
December 15th, 1995
FLEET COMMANDER'S NOTE:
Although the above represent excellent ideas and proposals for the EH and I will endeavor to implement them, they are necessarily definitive courses of action for the Fleet...
-----------------------------------------------------------------------------------------------------
SQUADRON HOME PAGES
In an effort to make the Emperor's Hammer the best club in the world (which it probably already is! :)), greater Internet visibility might be a good start. I have created a semi-generic page that will work for all squadrons in the club (IW Squadrons might have to modify a little since their squadrons only have 10 members). If you don't use AOL, you will have to have another service to upload to, or you can send me the file at Md128m@aol.com. Included with this Write file is a web file (squadpag.htm) that you can do all the modifications on. Its contents are the same as below. You can modify the htm file with any word proccessor (including Write and Notepad).
Here is what the base page looks like:
<!DOCTYPE HTML PUBLIC "-//IETF//DTD HTML 3.0//EN" "html.dtd">
<HTML>
<HEAD><TITLE>NAME Squadron's Home Page</TITLE>
</HEAD>
<BODY BGCOLOR="#000000" TEXT="#FFFF00" LINK="#0000FF" VLINK="#FF0000" ALINK="#00FF00">
<H1><CENTER>NAME Squadron's Home Page</CENTER></H1>
<CENTER><IMG SRC="ftp://members.aol.com/SCREENNAME/IMAGENAME"></CENTER>
<HR>
<P>
<H3>Welcome to NAME Squadron's Home Page! We are a TYPE squadron in the <A HREF="http://homepage.interaccess.com/~csphil/roster.html">Emperor's Hammer</A> online TIE Fighter club.</H3>
<HR>
<H3>Our Motto: MOTTO
<P>Our Nickname: NICKNAME
<P>Our Commander: <A HREF="mailto:ADDRESS">COMMANDER</A></H3>
<HR>
<H2>NAME Squadron's Roster:</H2>
<H3><P>FLIGHT I - SHIP
<P>1)<A HREF="mailto:ADDRESS"> NAME</A>
<P>2)<A HREF="mailto:ADDRESS"> NAME</A>
<P>3)<A HREF="mailto:ADDRESS"> NAME</A>
<P>4)<A HREF="mailto:ADDRESS"> NAME</A>
<P>FLIGHT II - SHIP
<P>1)<A HREF="mailto:ADDRESS"> NAME</A>
<P>2)<A HREF="mailto:ADDRESS"> NAME</A>
<P>3)<A HREF="mailto:ADDRESS"> NAME</A>
<P>4)<A HREF="mailto:ADDRESS"> NAME</A>
<P>FLIGHT III - SHIP
<P>1)<A HREF="mailto:ADDRESS"> NAME</A>
<P>2)<A HREF="mailto:ADDRESS"> NAME</A>
<P>3)<A HREF="mailto:ADDRESS"> NAME</A>
<P>4)<A HREF="mailto:ADDRESS"> NAME</A>
</H3>
<HR>
<H2>Some Good Links</H2>
<H3><A HREF="http://www.interaccess.com/users/csphil/hamm.html">Emperor's Hammer Home Page</A>
<P><A HREF="http://www.interport.net/~blundy/jedi/">Dark Brotherhood Home Page</A>
<P><A HREF="http://users.aol.com/md128m/eh/corp.html">Emperor's Hammer Corporate Division Home Page</A>
<P><A HREF="http://www.io.org/~bauyeun/phpl.cgi?pages/conscript.html">Join the Emperor's Hammer</A></H3>
<HR>
<H4>This page created by <A HREF="mailto:md128m@aol.com">BG DanMan</A> and <A HREF="mailto:ADDRESS">NAME</A> of the Emperor's Hammer with</H4>
<H4><A HREF="http://www.sausage.com">The Hotdog Web Editor</A></H4>
<H4>This page has been <A HREF="http://home.netscape.com">Netscape</A> Enhanced</H4>
</BODY>
</HTML>
Customizing the Page:
Where it says NAME Squadron, change the word NAME to your squadron's name (Sigma, Tau, Lambda, Theta, etc.). Where it says SCREENNAME/IMAGENAME, this would be the squadron's banner. If the squadron does not have a banner, the entire line can be deleted. Everyone on AOL has a ftp/web area on AOL. The address is http://members.aol.com/SCREENNAME where SCREENNAME represents the owners screenname. This is created when you first use internet on AOL. To activate the banner section, change SCREENNAME to the screenname you used to upload the graphic to AOL (how to upload explained later). After that, change IMAGENAME to what you named the banner picture when you uploaded it (sigma.gif, tau.gif, etc.). Always upload in either GIF or JPG formats. Most browsers don't recognize low-res pictures (BMP, PCX, etc.). Now you should be down to: Welcome to NAME Squadron's Home Page, we are a TYPE... Change NAME to your squadron's name, and TYPE to its mission (Close Support, Strike, Assault, etc.). Now change MOTTO to your squadron's motto and NICKNAME to your squadron's nickname. Where it says mailto:ADDRESS, change ADDRESS to your Squadron Commander's address, and then change COMMANDER to your commander's name (BG Bob, LG Tim, MG Fred, etc.). Now you should be at the part where it says NAME squadron's roster. As usual, change NAME to your squadron's name. Where it says FLIGHT 1 - SHIP, change SHIP to the appropriate ship for that flight. Do the same with FLIGHT 2 - SHIP, and FLIGHT 3 - SHIP. After that, there are a bunch of <A HREF="mailto:ADDRESS">NAME</A>
Change ADDRESS to the members Internet address, and NAME to their rank and callsign (MG Fred, LG Bob, etc.). You can get this info off the Newsletter roster. This applies for all of the positions, except TBAs. If a position is TBA, then delete the <A HREF...</A> statement, and type TBA in its place. You can ignore the links part, those are just hyperlinks to: The Maing Home Page, The Corporate Division Home Page, The Dark Brotherhood Home Page, and the Conscription Center. At the end, where it says Created by <A HREF...>BG DanMan</A>, and <A HREF="mailto:ADDRESS">NAME</A>, change ADDRESS to your e-mail address, and NAME to your rank and callsign.
Uploading to AOL:
To upload to AOL, go to Keyword: Personal Publisher, then select My Place from the menu, then select the Go to My Place icon, the click on the Upload icon. Type the name that you want the page to be called (namehere.html), then click on Continue. After that, click on Select File to browse the directories on your computer for the web file. After you select the file, click on Send. Now repeat the process for the squadron's banner (if applicable). Note: You MUST tell AOL to use the same filename you used in the web page for the banner, or else it will not display. Afterwards, the pages URL will be http://members.aol.com/SCREENNAME/FILENAME.html where SCREENNAME represents your screenname and FILENAME represents the name you uploaded the file as.
I know this has been hard to follow, but if you got it to work, Congratulations! Your squadron now has a fully functional web page. If you have any problems whatsoever, e-mail me at Md128m@aol.com.
Respectfully Submitted,
Brigadier General DanMan
CMDR/BG DanMan/Vulture-1/CRS Dsp/IW/EH [App] [Lancer] MoT -rh
December 16th, 1995
-------------------------------------------------------------------------------
GAME REVIEWS
By BG DanMan
TIE Fighter Collector's CD:
TIE CD is an okay add on despite its steep price. The high resolution graphics are very nice. Some of the new cutscenes, including a revised title sequence, are very nicely done. The missions aren't anything special though, pretty much like Defender of the Empire, keep hunting for Zaarin. Ships can now be edited in TIE CD, and mission editing is not a problem either. No modem/network play is very disapointing, although I hear that the third and final game in the X-Wing/TIE Fighter series will have it, although that's what they said about TIE CD. The third game supposedly takes place during Return of the Jedi, and you are a pirate/smuggler/alien. Seems Privateerish to me...
X-Wing:
The Classic. This game is harder than TIE Fighter with the difficulty set to hard. The missions are just different enough to keep you coming back for more. Compared to some of the advanced ships from TIE Fighter, the Rebel fighters don't seem like much, but that just adds to the challenge. When X-Wing came out, it was revolutionary. The graphics didn't fuzz when you got close to something, which was a major improvement over other games of the time. Also, there's nothing like blowing up the Death Star and watching it go up it flames.
Rebel Assault:
A good game. The gameplay is somewhat limited though. You can't really move from the preprogrammed course. The 3-D graphics are great though. It features real footage from the Star Wars movies, and has a load of brand new animations. You pilot the T-16, X-Wing, Snowspeeder, and A-Wing., plus third-person shooting.
Rebel Assault II:
If you liked the first one, you'll love this one. The opposite is also true. LucasArts did a bit, but not much to improve the preprogrammed course settings, although you do have a little control. That little control can be very frustrating though. It involves dodging obstacles in first-person flight, but since you don't move that fast, you will often run into the obstacles. Third-person shooting has been improved though. You can crouch behind walls, and the environment is interactive. The addition of live video to the game adds a nice touch of realism.
Dark Forces:
Another winner. This game has only two downsides. One, the inability to save games, and two, no network/modem play. Fortunately, this game has lots of upsides. The environment is 3-D. You can walk over enemies on catwalks, shoot down from windows, and ride moving platforms over large chasms. Almost everything from the Star Wars universe makes an appearance. Even Boba Fett shows up, along with an Ewok, Gamorrean Guards, Grans, and Trandoshans. Dark Forces is also editable. There are editors that allow you to: Edit levels, pictures, and objects. Overall, Dark Forces is a great game.
Respectfully Submitted,
Brigadier General DanMan
CMDR/BG DanMan/Vulture-1/CRS Dsp/IW/EH
January 4th, 1995
FM/GN Stryker/Sigma-1/SSD Avr
"The Message Log"
I was doing a little routine file maintenance, from the terminal in my quarters aboard the SSD Avenger, when I ran across the old message log. Normally, message logs are kept in the squadron file area. Flight members, flight leaders, and squadron commanders have one week to review mission performance prior to transfer of the message logs to the central archive. This particular message log had been edited so that it did not contain classified information, or specific messages to flight groups other than my own. The filename indicated that the message log was from mission two of my second battle with the Emperor's Hammer. I remembered that mission ... it was a strike against Rebel fighter and starship defenses around the Calamari shipyards. Mission details began to surface from the depths of my memory as I scanned the message log:

My four-ship flight group of Missile Boats (MIS Beta) dropped out of hyperspace about halfway between Rebel PLT XQ5 CAL-365 and the Imperial Modified Frigate Raptor. The Rebel platform detected our exit from hyperspace and immediately broadcast a distress signal. I ordered my wingmen to attack the platform while I prepared to engage its starfighter defenses. We were about to have company...
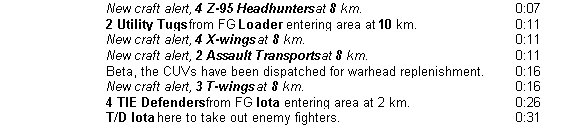
By the time our escort, T/D Iota, had launched, my secondary shields were still only half charged -- Missile Boats weren't known for the capacity of their generating systems. ATR group Marauder was heading for M/FRG Raptor, but I had a few minutes before I had to deal with the two ATRs. My threat display indicated that X-W Red was the nearest enemy flight group attacking MIS Beta, so I targeted X-W Red 1 and prepared to launch fire-linked advanced concussion missiles...

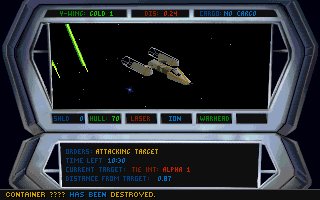
I nailed three X-Ws in rapid succession, then checked the threat display again ... T-W T-Gold was attacking T/D Iota, while Z-95 Zebe targeted my wingmen and me. A Rebel Frigate arrived as I locked onto the nearest Headhunter. I fired a single missile each at Z-95 Zebe 2 and Zebe 3, to take the heat off my wingmen prior to beginning my attack run on the Rebel Frigate...

Rebel FRG Corsair launched four Y-Ws as I began firing heavy rockets -- I noticed that the first pair of rockets triggered the FRG's anti-warhead missile defenses, so I continued to fire until fourteen rockets were hurtling toward the Corsair. Twelve rockets would kill a Frigate, but the extra pair might be needed if the Corsair managed to knock down one or two. One of my wingmen bought it during my attack run, and a pair of Rebel M/CRVs dropped out of hyperspace near the platform. I came about, targeted the nearest Z-95, and switched back to concussion missiles as death rained against the hull of the hapless Corsair...

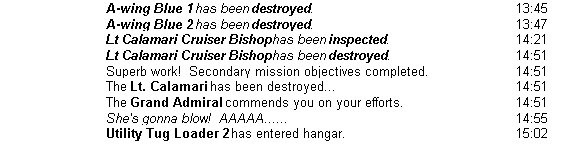
[GA Ronin replaced the orginal graphic with the above CG,
from the TIE Fighter game, LucasArts, 1994,
to reduce this submission's memory size]
A Rebel Lt. Calamari arrived as I approached firing range of Z-95 Zebe 4. Somebody nailed a Y-W a few seconds before I started to get tone on the Z-95. I fired a single missile at the Headhunter, then went after Y-Red 4. I needed to thin out the enemy fighter cover as I worked my way to within firing range of ATR Marauder. The Rebs were putting up a fierce defense -- T/D Iota 2 went down, and I lost another wingman in almost the same instant that I destroyed Zebe 1...
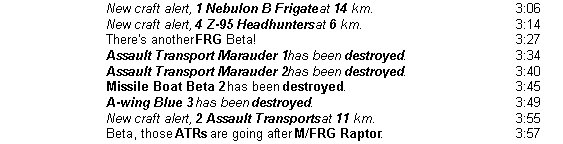
I lined up on ATR Marauder and engaged the SLAM drive to close the distance to firing range. A second Rebel Frigate dropped out of hyperspace, and the platform launched another group of Headhunters. This corner of the universe was starting to get a bit more crowded than I would prefer. I fired a single rocket at each Assault Transport, leaving me with four rockets and a half-load of missiles. The second Rebel Frigate was in the general direction of M/FRG Raptor and the reload CUVs, so I decided to dump my remaining ordnance into the Rebel Frigate and reload. I lost my remaining wingman as I engaged the SLAM drive and headed for Rebel FRG Golem. Targeting the platform, I saw that its shield level was 54% -- those Rebels had done a good job defending the platform against my wingmen. I would have to kill the platform myself, as well as a pair of M/CRVs, an Lt. Calamari, and a Frigate. That much destruction would require a lot of ordnance...

T/D Iota killed a T-W and two Y-Ws as I approached FRG Golem, but lost Iota 1 and Iota 4. I fired my remaining missiles into the Golem's missile launcher, then let her have my last four rockets. I received a message that T/D Iota had been destroyed, and suddenly, I felt very alone. I engaged the SLAM drive and headed for CUV Loader 1. Checking the inflight map, I saw that several groups of Rebel fighters were heading in my direction -- probably because my Missile Boat was the only Imperial fighter still flying. I cut my engines about 3km from the CUV, but still overshot the CUV's position by a kilometer. I circled back around and came to rest near the CUV. Targeting the nearest Rebel fighter, I saw that I had wasted too much time -- they were almost within missile range...

A T-wing was closest, followed by a flight group of Z-95s in close formation. Those Headhunters were going to be a problem. I fired a missile at the T-W after a couple of seconds of yellow, then targeted the Z-95s and began firing missiles as rapidly as I could. No joy -- the Headhunters were already within cannon range. I nailed Zebe 2, but the remaining Headhunters shot down my missiles and destroyed the CUV. Damn ... I had a nearly complete reload of rockets, but only six concussion missiles and a sky full of hostile fighters...

I throttled up and checked my threat display for any hostiles that were targeting the last CUV. A-W Blue 1 was the only enemy fighter targeting Loader 2, so I toasted Blue 1 with two of my six missiles and then went after the ATRs. After launching a single rocket each at the ATRs, I targeted the platform and engaged the SLAM drive. I disengaged the SLAM at 6km and fired ten rockets at the platform -- shields were at 56%, so ten rockets might not be enough, but I didn't want to waste any. I pulled around and headed in the direction of M/CRV group Hero. Headhunter Zebe 1 was moving to intercept, so I targeted the Z-95 and switched to single-fire missiles. Platform XQ5 CAL-365 died as I closed with Zebe 1. A single missile ended the Headhunter's attack, allowing me to quickly target the M/CRVs of Hero group and fire a pair of rockets at each. T-wing group T-Gold had closed to within firing range, so I used my beam and the last three missiles to kill T-Gold. I was out of missiles, but I had two rockets left, so I engaged the SLAM drive and headed for CRL Bishop to dump my last two rockets. I disengaged the SLAM at about 6km and fired my last two rockets, then engaged Y-W Y-Red 3 with cannon. The Missile Boat is not a dogfighter's dream, but it handles fairly well and the single rapid-fire cannon can do about as much damage as a pair of cannon -- at least until cannon energy is completely drained. It didn't take long to punch through the Y-W's hull. I headed for CUV Loader 2 as Y-Red 3 broke apart amid eruptions of flaming ordnance...
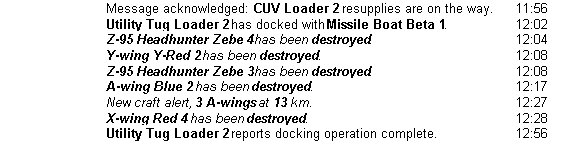
Once again I was the object of attention for every combat-worthy Rebel fighter in the area. But this time they came at me staggered apart so that I had time to target and fire at each approaching fighter. I monitored the approach of the nearest fighters as I coasted to a dead stop next to the CUV. I waited a few seconds for the CUV to dock, then anxiously checked my threat display to see how much longer I had to wait. Great globular clusters! The CUV was just sitting there! I signaled for a reload and targeted the nearest Rebel fighter. This was going to be close ... the CUV loaded the first two missiles just as Zebe 4 approached to within 2km. I fired at Zebe 4, then targeted the next fighter and fired after a couple of seconds of yellow. I continued to rapidly target and fire until the immediate area was clear of hostiles. CRL Bishop launched a new flight of A-Ws, but they wouldn't reach me until the reload operation was complete. I remembered this reload operation clearly -- I had checked the mission log after returning to base and realized that I had forgotten to request a reload prior to rendezvousing with CUV Loader 2. Unfortunately, my squadron commander reviewed the mission log as well -- that little slip cost me a week on KP...
I throttled up as soon as Loader 2 signalled that the reload operation was complete. The Lt. Calamari had about 75% shields, and the Golem still had about 50% shields. I would need a minimum of 9 rockets to finish the CRL, and 8 rockets to finish the FRG. There were only four Rebel fighters between me and the Bishop, and the flight group of A-Ws would pose the greatest threat -- so I iced A-W Blue 1 and Blue 2 with fire-linked missiles on a head-to-head pass and then locked onto CRL Bishop and engaged the SLAM drive. I disengaged the SLAM at 6km and began firing rockets as soon as I got tone, but I was moving too fast -- I only got 8 rockets into the CRL before I flew into her cannon range. The Bishop's gunners nailed rockets nine and ten shortly after I fired them, and the characteristic sizzle of cannon bolts impacting my energy shields became an almost continuous background cacophany. I jinked toward another part of the CRL's hull and fired another pair of rockets -- BLAM! Both rockets detonated just off my bow. My shields were getting dangerously low, but I headed in closer and fired another pair of rockets at point blank range. The Bishop's gunners punched through my shields as I pulled about and headed for empty space. There was only one thing good about the loud reverberation through the Missile Boat cockpit as hull alloy flashed into vapor -- I was still alive to hear it. Weaving away from the CRL, I checked my map to locate the last two Rebel fighters. They were closing to within firing range, but my missile launchers were off-line and my CMD viewscreen was blown. I re-directed all energy to the engines and engaged the SLAM drive in a direction away from all pursuit. A-W Blue 3 fired a missile at me as CRL Bishop lost helm control and began to break up. I was already moving nearly twice as fast as a missile, so the only thing worrying me was whether or not I could put enough distance between my Missile Boat and the pursuing A-W so that I could recharge shields before engaging the Rebel...
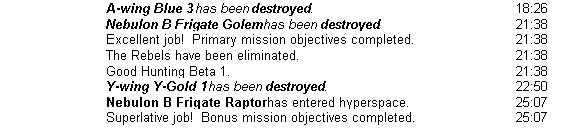
I was several kilometers ahead of A-W Blue 3 by the time the I ran out of stored energy and the SLAM disengaged. My launchers were almost back on-line, and I was still coasting very fast. I reset laser and shield recharge to maximum and tried to figure out how I could ice the remaining Rebels using a severely hull-damaged Missile Boat without a CMD viewscreen. Aha! I'll just use the Threat Display to monitor targeting info! When shields were recharged to my satisfaction, I came about and headed for the A-W. Monitoring the Threat Display, I waited until A-W Blue 3 approached to within 2.5km, then fired a pair of missiles as soon as I got tone. The missiles detonated on target seconds later, obliterating another enemy of the Empire. Y-Gold 1 was several kilometers behind A-W Blue 3, and was no particular threat. I had six rockets left -- no longer enough to finish the Golem since I had wasted four in my attack on CRL Bishop. However, I still had 34 missiles, and that would be enough. I decided to ignore the Y-W until FRG Golem was dead. I reset energy levels to 50% nominal and engaged the SLAM, heading for the doomed Rebel FRG. Arriving at the Golem well ahead of Y-Gold 1, I used twenty missiles to bring the FRG's shields down, then cracked her hull with my remaining rockets. As the Golem spouted flame and died, I engaged and destroyed the last Rebel fighter, Y-Gold 1. Area secure. I escorted the Raptor to her hyperspace point, then limped home.
The operation had been an unqualified success, with the Rebels losing a platform, five capital ships, and some three dozen fighters -- but it seemed almost a Pyrrhic victory. We had lost an entire flight of TIE Defenders, and three of Thrawn's precious Missile Boats. Still ... the Rebels could not win a war of attrition -- and seven Imperial losses to thirty five Rebels plus five Rebel capital ships was not bad at all!
FM/GN Tybolt/Beta-1/SSD Avr
In Praise of Darkness
Anthrax and fruit bats,
stir in a summer night's breeze.
Breathe in the moonlight,
blue in the midsummer's sleep.
The wind whispers,
Stirring silent night sounds,
Breath damp with cool dew,
Blowing as softly as a sigh.
Alive in the night, dark
frightens the light, and unseen forces
rule until dawn.
Add to a touch of danger,
a taste of death,
and to that, a faerie kiss,
for fantasy, too, shuns the light.
And the breeze blows on.
And the demons of dark unwittingly herald the
dawn.
Just as no precense can be when absence is not,
nor can light exist without unlight.
Crucifix and scientist,
Harness the return of the sun,
To beat back evil shadows,
Enlighten until there are none.
The light reveals
only the remains of night,
the limp corpses left by the
shadows that preyed.
The damp dew dries and
reunites with the blowing morning's breeze,
and visibility rules until dusk.
Those who walk only in light
miss the mystery
of whispered wings
and the brush of fir.
They deny the darkness within
by pretending
that their light needs no darkness.
They addict themselves to artificial light,
and all of Nature's shades of shadow
are bleached
sterile white.
Lost is the half that makes whole.
The losers are blinded as they look to the sun.
Oh, Lord Abraxas,
May I never betray my dual allegiance
to your opposing poles that
balance
my
life
.
My God, I beg thee,
allow no flashlights
on the dark side of the moon.